

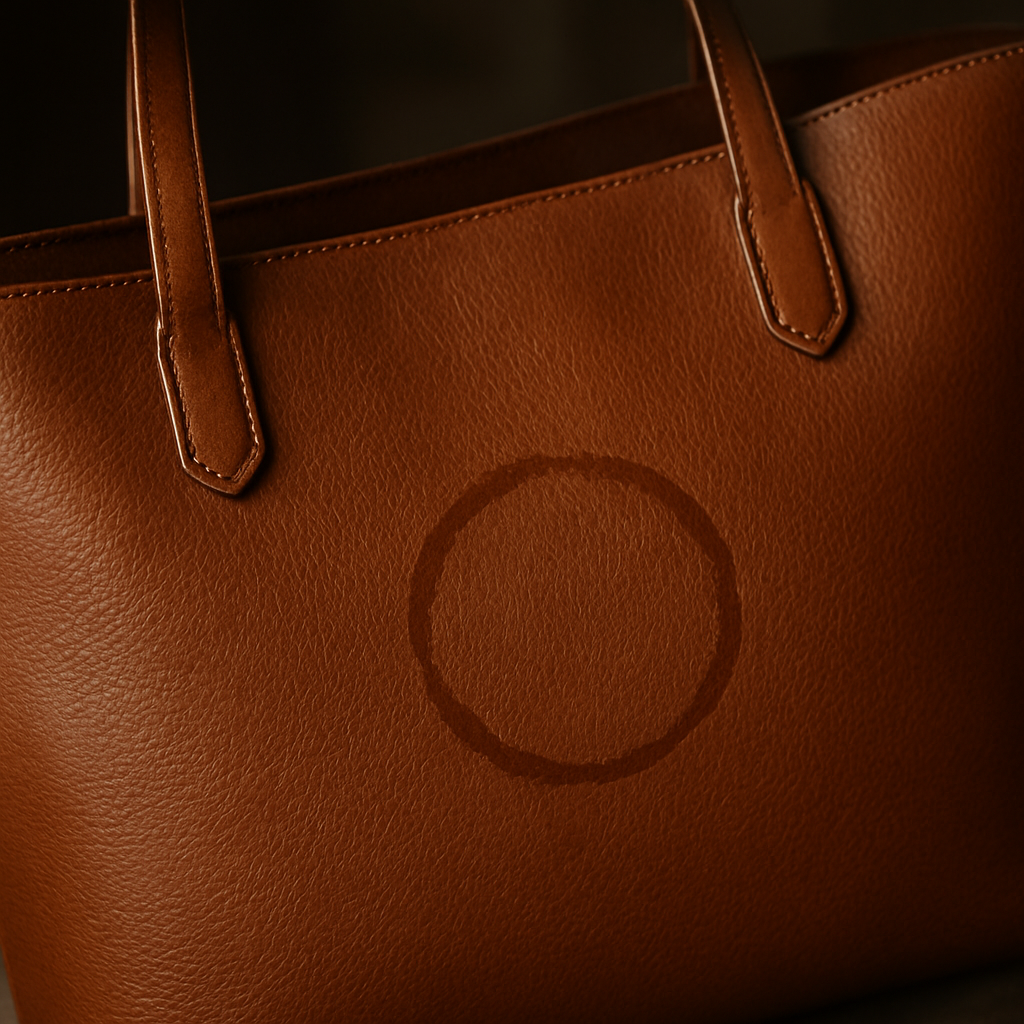
Ever stared at your favorite leather bag and noticed a stubborn coffee ring that just won’t fade?
It feels like a tiny betrayal – you’ve invested in a luxe accessory, and now a blemish is stealing the spotlight.
Don’t worry, you’re not alone. Most of us have faced that moment when a splash, a lipstick kiss, or a rain spot threatens the pristine look of our designer piece.
Here’s the good news: removing stains from a leather bag isn’t rocket science, but it does need a gentle, knowledgeable touch.
Think of your leather like a delicate piece of art. You wouldn’t use a harsh scrubber on a painting, right? The same principle applies – you need the right tools, a bit of patience, and the confidence that you can restore that elegant finish.
In the next few minutes, we’ll walk through the most common culprits – from oil and ink to food spills – and show you step‑by‑step how to treat each one without compromising the bag’s suppleness.
Imagine the satisfaction of watching that dark mark disappear, leaving the leather as smooth and vibrant as the day you first unboxed it. That’s the feeling we’re aiming for.
We’ll also share a few insider tips that luxury shoppers swear by, like why a soft microfiber cloth is your new best friend, and how a dab of mild soap can work wonders when used correctly.
So, ready to rescue your bag and keep it runway‑ready?
Let’s dive in, and by the end you’ll have a simple, reliable routine for tackling any stain that dares to appear.
TL;DR
If a coffee ring or rain spot threatens your designer tote, this guide shows you exactly how to remove stains from leather bag without damaging its luxe finish. Follow our simple, step‑by‑step routine—cleaning tools, a microfiber cloth, mild soap—and watch the blemish vanish, keeping your accessory runway‑ready and confidence high.
Step 1: Identify the Stain Type
First thing’s first – you’ve got to know what you’re dealing with. A coffee ring, a splash of perfume, or a rogue ink blot each whisper a different story, and the way you respond changes entirely.
Think about the last time you spilled something on your favorite tote. Did the liquid sit on the surface, leaving a dark halo? Or did it seep in, turning the leather a dull shade? That little observation is the compass that guides the rest of your cleaning routine.
Common culprits and how they behave
Water‑based stains – coffee, tea, juice. They usually stay on the surface and can be lifted with a gentle damp cloth.
Oil‑based stains – lipstick, sunscreen, greasy foods. These penetrate the pores, so you’ll need something that can break down the oil without stripping the leather’s natural oils.
Ink or dye – pens, markers, even a stray eyeliner swipe. Ink tends to bond tightly, requiring a more targeted approach.
And what about that mysterious dark ring that seems to appear out of nowhere? It could be a combination of sweat and the bag’s own finish reacting to humidity. Trust me, we’ve all been there.
Now, before you grab any cleaning product, pause and ask yourself: Is this stain water‑soluble, oil‑based, or pigment‑based? Your answer will dictate the next step.
Quick test to confirm the type
Grab a clean white cotton swab. Lightly dab the edge of the stain – not the center. If the swab picks up color, you’re likely dealing with a water‑based stain. If it stays clean, the culprit is probably oil or pigment.
Another trick: press a dry paper towel onto the spot. A quick absorption means there’s still moisture on the surface – again, a water‑based issue. No change? You might be looking at a deeper, oil‑rich mess.
These tiny diagnostics feel a bit like a detective game, but they save you from over‑cleaning and potentially ruining that buttery‑soft finish.
Once you’ve nailed the stain category, you can move on to the right remedy. Need a full walk‑through of the whole cleaning process? Check out How to Clean a Leather Handbag at Home: A Step‑by‑Step Luxury Guide for a deeper dive.
Here’s a quick cheat‑sheet you can keep in your purse:
- Water‑based: mild soap + damp cloth.
- Oil‑based: leather‑safe degreaser or a dab of baby oil, then wipe.
- Ink: isopropyl alcohol on a cotton swab, test on hidden area first.
Remember, the goal isn’t to scrub aggressively; it’s to coax the stain out while preserving the leather’s natural patina.
Feeling a bit overwhelmed? You’re not alone. That’s why we love tools that make the process feel almost effortless.
That short video walks you through the visual cues you’ll see when you press a swab against different stains. It’s a handy visual companion to the text above.
Now, let’s talk about why you might want to dive deeper into the science of stain removal. Some fashion‑forward readers love to understand the chemistry behind the products they use. If you’re curious about how certain cleaners interact with leather fibers, you might find the insights from Missing Linkz streetwear blog surprisingly relevant – they often discuss material care in the context of bold, statement pieces.
And if you run a boutique or a fashion blog yourself, you’ll appreciate tools that streamline content creation. Platforms like RebelGrowth offer automated content engines that can help you share these care tips with your audience without the heavy lifting.
So, to recap: identify the stain type, run a quick swab test, and choose the right gentle solution. Once you’ve nailed that, the rest of the cleaning routine will feel like a breeze, and your bag will thank you with its renewed glow.
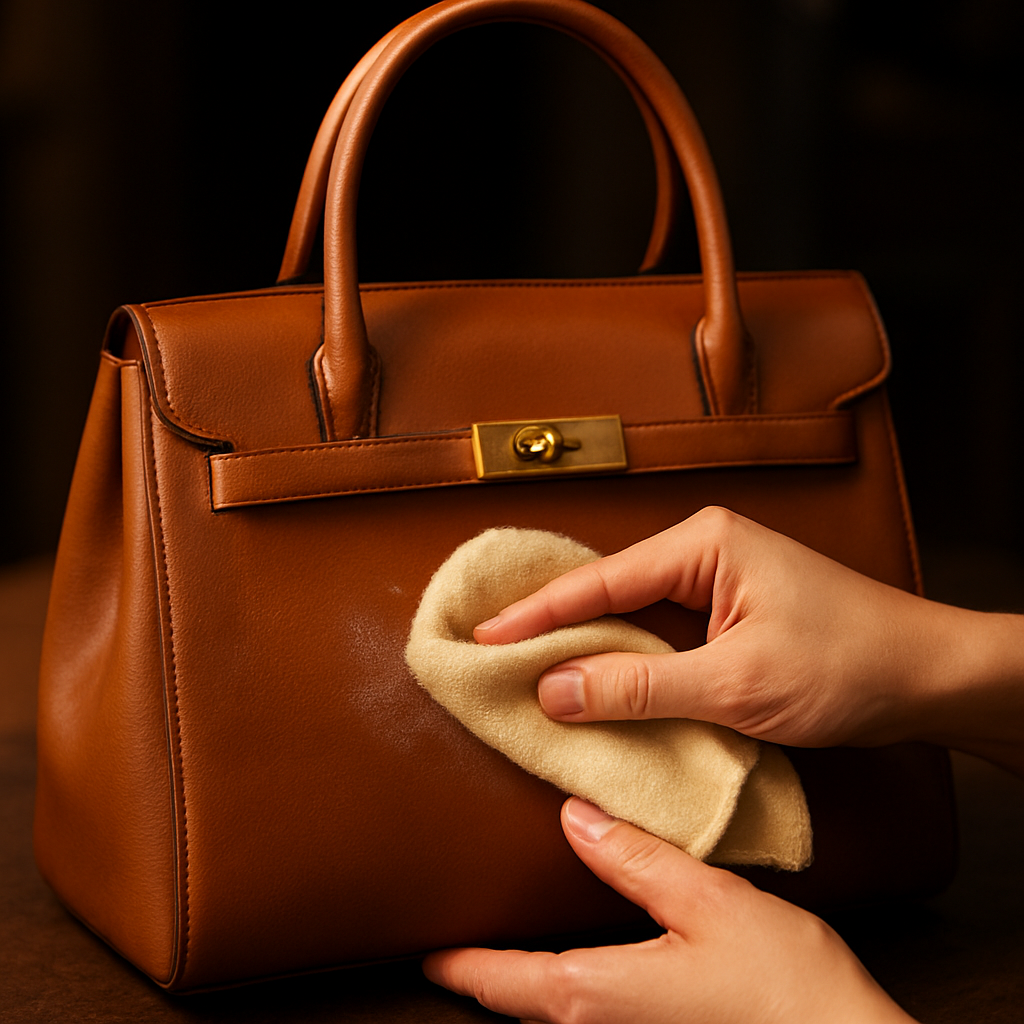
Step 2: Gentle Cleaning Techniques
Now that you know what you're dealing with, it’s time to treat the bag the way you would a delicate silk scarf – with patience and the right touch. This is the heart of how to remove stains from leather bag without turning a minor mishap into a full‑blown disaster.
Gather Your Soft Arsenal
First, grab a clean, ultra‑soft microfiber cloth – think of it as the plush napkin you’d use for a five‑star dessert. You’ll also need a bowl of lukewarm water, a few drops of a pH‑balanced leather soap (or a gentle baby shampoo if you’re in a pinch), and a second dry cloth for blotting.
And don’t forget a cotton swab for those tiny crevices around hardware or stitching. The goal is to keep everything friction‑free so the leather’s natural oils stay intact.
Step‑by‑Step Gentle Wash
1. Test a hidden spot. Lightly dab a corner of the bag with a damp cloth; if the color holds steady, you’re good to go.
2. Dampen the cloth. Moisten your microfiber with the lukewarm water, then wring it out until it’s just barely moist – no soggy sopping.
3. Apply a whisper of soap. Add a single pea‑sized amount of the leather‑safe soap onto the cloth. You’ll see a faint lather; that’s all the cleaning power you need.
4. Gently rub the stain. Use circular, feather‑light motions, starting from the outer edge of the mark and working inward. Think of it as coaxing the stain out rather than scrubbing it away.
5. Blot, don’t rub. After a few seconds, take the dry cloth and press gently to lift the moisture and loosened pigment. Resist the urge to rub hard; you’ll just spread the stain.
6. Rinse the cloth. Rinse the microfiber under clean water, wring it, and repeat the gentle wipe once more – this time with plain water to remove any soap residue.
7. Dry naturally. Lay the bag flat in a well‑ventilated area, away from direct heat or sunlight. Let it air‑dry for at least an hour before you touch it again.
Special Cases: Oil‑Based Stains
If the culprit was lipstick, mascara, or a splash of perfume, water alone won’t cut it. After the initial gentle wipe, add a drop of the same mild soap directly onto the stain, then use a fresh damp cloth to work it in. You’ll notice the oily residue start to break down – that’s the soap lifting the lip pigment without stripping the leather’s finish.
For stubborn oil spots, a tiny dab of specialized leather cleaner (saved for later steps) can be introduced, but keep it to a minimum. The less you introduce foreign chemicals, the better the leather retains its suppleness.
What About Patented or Saffiano Surfaces?
Patented leather is glossy and non‑porous, so it reacts well to a simple damp cloth and a mild soap – avoid anything abrasive. Saffiano’s textured grain can trap particles, so give extra attention to the crevices with a cotton swab dipped in the same gentle solution.
Does this feel like a lot? Not really – it’s just a few mindful minutes that keep your bag looking runway‑ready.
Here’s a quick visual recap:
Take a breath, then give your bag that soft, loving touch. You’ll be amazed at how quickly the stain lifts, leaving the leather as supple as the day you first unboxed it. And remember, the key to success is always “less is more” – a light hand, a clean cloth, and a little patience.
Ready to move on? The next step will show you how to protect the cleaned surface so the stain never returns.
Step 3: Deep Stain Removal for Tough Marks
So you’ve tried the gentle wipe and the coffee ring is still hanging on like an unwanted guest? That’s when we pull out the heavy‑duty, but still super‑gentle, toolbox for deep stain removal.
Spot the stubborn area
First, take a step back and really look at the mark. Is it a dark ink blot, a dried wine splash, or a greasy lipstick smudge that’s seeped into the grain? The texture tells you a lot – a raised, glossy residue usually means oil, while a matte, crusty patch points to pigment that’s settled deeper.
Ask yourself: does the stain feel sticky when you lightly press a cotton swab on it? If it does, you’re dealing with something that needs a solvent‑based approach, not just water.
Pick the right deep‑cleaner
For tough, water‑based stains (think wine, tea, or coffee that’s baked in), a mixture of distilled water and a few drops of pH‑balanced leather soap works wonders. For oil‑based or pigment‑heavy stains, reach for a leather‑specific cleaner that’s formulated to break down lipids without stripping the finish. You can find these cleaners in the same luxury care range we recommend for all our bags.
Pro tip: always test your chosen cleaner on a hidden seam or underside of a strap. Dab a tiny amount with a cotton swab, wait a minute, and check for any discoloration. If the leather stays the same shade, you’re good to go.
Gentle agitation technique
Now, dampen a soft microfiber cloth just enough that it’s barely moist. Add a pea‑sized amount of your cleaner and work it into the stain using small, circular motions. Think of it as coaxing the stain out rather than scrubbing it away – you don’t want to rub the leather raw.
For crevices or stitching, switch to a soft‑bristled brush or a cotton‑tipped applicator. Lightly tap the brush into the grooves, let the cleaner sit for 30 seconds, then wipe away with a clean, dry part of the cloth.
Does this feel like a lot of steps? It’s actually a quick 5‑minute ritual that respects the leather’s natural oils while attacking the grime.
Rinse, dry, and condition
After you’ve worked the cleaner in, grab a second microfiber cloth dampened with plain distilled water. Gently blot the area to lift any leftover soap or solvent. No vigorous rubbing – just a soft press.
Let the bag air‑dry in a shaded, well‑ventilated spot. Avoid direct sunlight or heaters, which can cause the leather to stiffen.
Once dry, finish with a thin layer of leather conditioner. This restores the suppleness you just protected and creates a barrier against future spills.
Think about it: a little conditioning now saves you from a whole new cleaning session later. It’s the luxury equivalent of a spa day for your bag.
Quick decision‑making table
| Tool / Product | Best For | Quick Tip |
|---|---|---|
| Distilled water + pH‑balanced leather soap | Water‑based stains (wine, coffee, tea) | Use a pea‑sized amount; avoid excess moisture |
| Leather‑specific cleaner | Oil‑based or pigment‑heavy stains (lipstick, ink) | Test on hidden area first; work in circular motions |
| Soft‑bristled brush or cotton swab | Crevices, stitching, textured grain | Tap lightly, let cleaner sit 30 seconds before wiping |
And there you have it – a step‑by‑step plan for how to remove stains from leather bag even when the mark seems impossible. You’ve already mastered the gentle wipe; now you’ve added the deep‑clean arsenal. Ready to give your bag that fresh‑out‑the‑box look again?
Step 4: Condition and Protect After Cleaning
Now that the stain is gone, the real magic happens when you give the leather a little TLC. Think of conditioning as the spa day that keeps your bag looking runway‑ready day after day.
Why conditioning matters
Leather naturally loses a bit of its oils each time it meets water, soap, or a bit of friction. Without those oils, the surface can feel stiff, look dull, and become more prone to future marks. A thin layer of conditioner replenishes the lost moisture, restores the supple feel, and creates a breathable barrier that repels spills before they sink in.
Does a fresh‑out‑the‑box look matter? Absolutely – it tells the world you treat your luxury pieces with the same care you’d give a designer dress.
Choosing the right conditioner
If you’re hunting for an all‑in‑one solution, many designers swear by a 2‑in‑1 leather cleaner and conditioner. It gently lifts any lingering residue while instantly feeding the leather with nourishing agents. One popular option praised by users for its “clean‑and‑condition” power is available on Amazon’s 2‑in‑1 leather cleaner and conditioner. The formula is designed for all leather types, from buttery full‑grain to sleek patent, and leaves a subtle shine without a greasy film.
When you shop, look for products that mention “pH‑balanced,” “non‑silicone,” and “infused with natural oils.” Those cues mean the conditioner won’t discolor or stiffen the leather.
Step‑by‑step conditioning
1. Let the bag dry completely. Even a whisper of moisture can trap conditioner and cause streaks.
2. Apply a pea‑sized amount. Squeeze a tiny dab of the 2‑in‑1 product onto a soft microfiber cloth. Less is more – you’ll spread it evenly without over‑saturating.
3. Massage in circular motions. Work from one edge to the next, using gentle, overlapping circles. Imagine you’re coaxing the leather to remember its original softness.
4. Let it sit. Give the conditioner 10‑15 minutes to soak in. This is the perfect moment to sip coffee and admire the bag’s renewed glow.
5. Buff lightly. With a clean, dry microfiber, glide over the surface to remove excess product and bring out a subtle sheen.
6. Check the hardware. A quick wipe of metal accents with the same cloth ensures no residue dulls the shine.
That’s it – no complicated steps, just a handful of mindful motions that lock in protection.
Pro tips for long‑term protection
• Store your bag in a breathable dust bag, not a plastic zip‑lock. Air circulation keeps the leather from developing mold.
• Rotate usage. Giving a favorite tote a day off lets the leather “breathe” and reduces wear on a single spot.
• Spot‑treat immediately when a new spill occurs. A quick dab of the 2‑in‑1 formula before the stain sets can prevent a full‑scale cleaning later.
• Re‑condition every 3‑4 months, or whenever the leather feels a little dry to the touch. Consistency beats panic cleaning.
By adding this conditioning routine to your stain‑removal workflow, you’re not just fixing a single mishap – you’re extending the life of your designer investment. Imagine opening your closet months from now and still seeing that same fresh‑out‑the‑box sparkle.
Ready to give your bag that lasting, luxurious feel? Grab a quality conditioner, follow the steps, and let your accessory shine with confidence.
FAQ
How do I safely remove a coffee stain from my leather bag?
First, blot the spill with a dry microfiber cloth – don’t rub, just press. Then dampen a fresh cloth with lukewarm water, add a pea‑sized amount of pH‑balanced leather soap, and gently dab the spot in circular motions. After a few seconds, use a dry cloth to absorb any moisture. Let the bag air‑dry away from heat, then finish with a thin layer of conditioner to restore suppleness.
What’s the best way to treat an oil‑based stain like lipstick?
Oil‑based stains need a little more TLC. Start with a dry wipe to remove excess product, then apply a tiny drop of mild leather‑safe soap directly onto the mark. Using a damp microfiber, work the soap into the stain with light, circular strokes – think of coaxing the oil out, not scrubbing. Rinse the cloth with plain water, blot clean, and once dry, condition the area to keep the leather from feeling stiff.
Can I use household products like vinegar or baking soda on my designer bag?
It’s tempting, but most household cleaners are too harsh for luxury leather. Vinegar’s acidity can strip the finish, and baking soda’s grit can create micro‑scratches. Stick to products formulated for leather – a gentle leather soap or a 2‑in‑1 cleaner/conditioner works wonders without compromising the bag’s sheen. If you ever doubt a product, test it on a hidden seam first.
How often should I condition my leather bag after cleaning?
Think of conditioning as a spa routine for your bag. Once every 3–4 months is a solid baseline, but if the leather feels dry to the touch after cleaning, apply a thin layer right away. Consistent conditioning keeps the leather supple, prevents cracks, and creates a breathable barrier that repels future spills. It’s a small habit that pays off in years of lasting luxury.
My bag has a patent leather finish – does the cleaning process change?
Patent leather is non‑porous, so it doesn’t absorb liquids the way full‑grain does. A damp cloth with a drop of mild soap is usually enough. Avoid abrasive pads – they’ll dull the glossy surface. After wiping, wipe dry with a soft cloth and give the bag a moment to air‑dry. If you notice any streaks, a quick buff with a clean microfiber will bring back that high‑shine look.
What should I do if a stain reappears after I’ve already cleaned it?
Sometimes a stubborn mark needs a second pass. Re‑assess the stain type – it might have been a mix of water‑ and oil‑based residues. Repeat the gentle cleaning steps, but this time use a slightly wetter cloth and a bit more soap, then rinse thoroughly. Once the stain lifts, don’t skip the conditioning step; it’ll seal the area and make future spots easier to tackle.
Conclusion
So there you have it – a simple, repeatable routine for how to remove stains from leather bag without sacrificing its luxe feel.
We’ve walked through spotting the stain, a gentle wash, a deeper rescue if needed, and the conditioning ritual that keeps the leather supple for years. Think about the moment you first unboxed that designer tote; now you can protect that excitement every time you step out.
What’s the next step? Grab a soft microfiber, keep a mild leather soap on hand, and treat any spill the minute it appears. A quick dab, a gentle wipe, and a thin layer of conditioner will make the difference between a one‑off mishap and a lasting scar.
Remember, consistency beats panic. A five‑minute check after coffee, rain, or lipstick keeps the bag looking runway‑ready and your confidence high.
And if you ever feel stuck, revisit the steps we’ve covered – the guide is there for a quick refresher. You’ve earned the know‑how; now let your bag shine.
Ready to give your favorite accessory the care it deserves? Treat it like a piece of art, and it’ll reward you with timeless elegance.
Keep this checklist in your handbag drawer, and you’ll never worry about a stray splash again ever for peace of mind.