

Ever pulled your favorite designer leather handbag out of the closet only to notice a stubborn spot that looks like a coffee ring, and felt that sinking feeling that maybe it's ruined?
You're not alone. Many of us have that moment where we stare at a beloved accessory and wonder if a quick home fix will save it or just make things worse.
Here's the good news: cleaning a leather handbag at home can be simple, safe, and surprisingly effective—if you use the right techniques and a gentle touch.
Think about it this way: leather is like the skin of a well‑crafted shoe; it breathes, it ages gracefully, but it also reacts to moisture and harsh chemicals. A few mindful steps can keep its suppleness and shine without stripping the natural oils.
First, always start with a soft, dry microfiber cloth. Lightly wipe away surface dust; this prevents grit from scratching the grain when you apply any liquid.
Next, create a mild cleaning solution using just a few drops of baby shampoo mixed with lukewarm water. Dip a corner of the cloth, wring it out until it's barely damp, and gently rub the stained area in circular motions. You’ll notice the grime lifting without saturating the leather.
After the spot is gone, use another clean, dry part of the cloth to blot away excess moisture. Let the bag air‑dry away from direct heat or sunlight—this avoids unwanted hardening.
Finally, restore the leather’s natural luster with a conditioner. A few drops of a leather‑specific conditioner, worked in with soft motions, will replenish oils and keep the bag supple for years to come.
Want a step‑by‑step walkthrough that shows exactly how I do it on a grained leather tote? Check out How I Clean My Leather Handbags at Home the Safe & Easy Way for a detailed guide.
So, does this sound doable? Absolutely. Grab a cloth, a little soap, and give your handbag the TLC it deserves. In just a few minutes you’ll see the difference, and your luxury accessory will look ready for its next outing.
TL;DR
Cleaning a leather handbag at home is quick, gentle, and safe when you start with a dry microfiber wipe, use a baby‑shampoo water mix, and finish with a leather conditioner.
Follow these simple steps and your designer bag will look refreshed, supple, and ready for its next outing without risking damage.
Step 1: Assess the Leather and Gather Premium Cleaning Supplies
Picture this: you pull your favorite designer tote from the closet, only to notice a faint scuff on the side that makes you wonder if the leather has lost its glow. That little moment of doubt is exactly why we start with a careful assessment before any cleaning ever begins. It’s the difference between a quick fix and a lasting revival.
First, give the bag a gentle visual sweep. Look for discoloration, dried oil spots, or cracks in the grain. These clues tell you how much moisture the leather can tolerate and whether you’ll need a conditioner later on.
Next, run your fingertips over the surface. A smooth, supple feel means the leather is still flexible; a stiff, gritty texture signals that it’s drying out and will need a richer oil blend. Trust your sense of touch—it’s the quickest diagnostic tool you have.
Now, identify the leather type. Grain, nubuck, patent or lambskin each respond differently to water and soap. If you’re unsure, a quick water test—dampen a cotton swab and press lightly—will reveal whether the surface darkens (usually smooth grain) or stays unchanged (often nubuck).
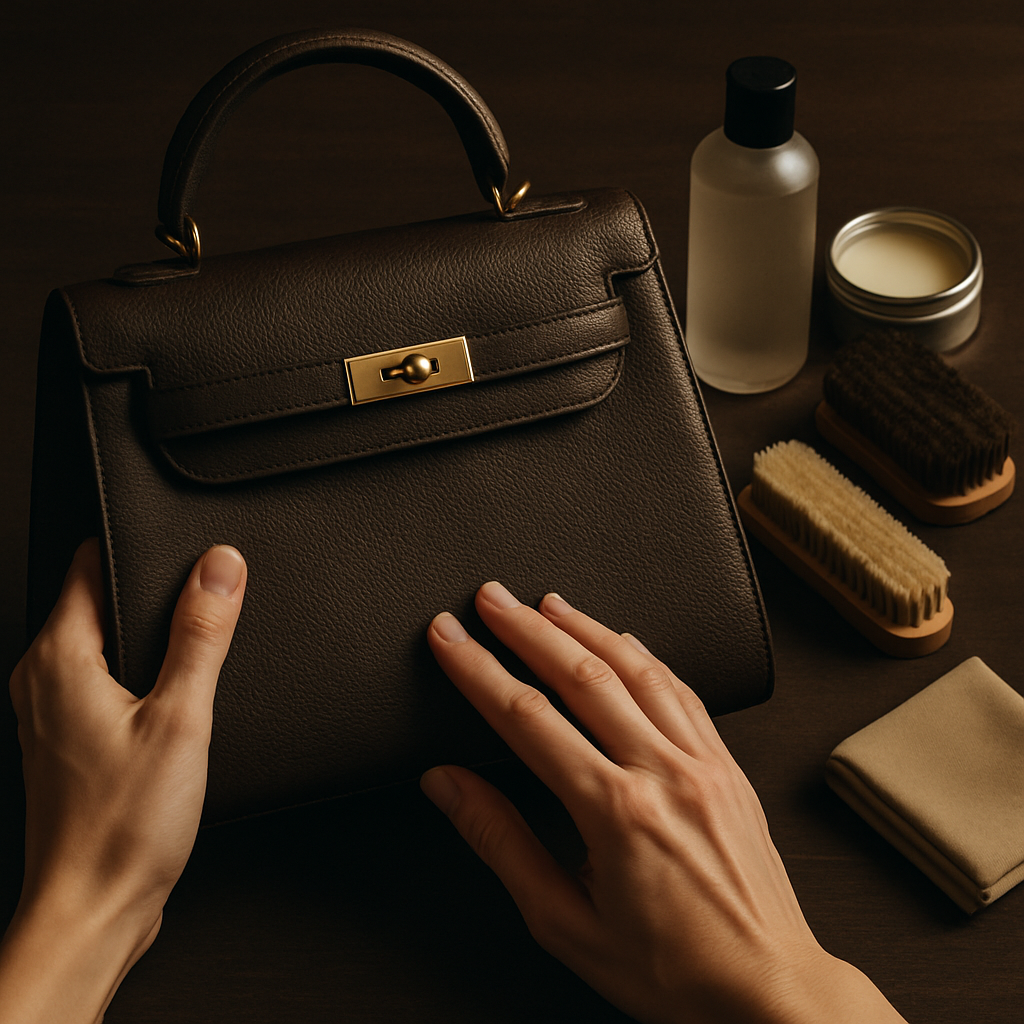
With that knowledge in hand, it’s time to gather the premium cleaning arsenal. You’ll need a soft, lint‑free microfiber cloth, a pH‑balanced leather cleaner or a baby‑shampoo solution, a small bowl of lukewarm water, a gentle leather conditioner, and a soft‑bristled brush for textured surfaces.
Why go premium? Cheap household detergents can strip the natural oils and leave the leather thirsty, which shows up as cracks later on. A dedicated leather cleaner respects the pH balance and lifts grime without over‑wetting, keeping the surface supple.
Here’s a quick checklist you can print out and stick to your vanity: • Microfiber cloth (white is best) • pH‑balanced leather cleaner or gentle baby‑shampoo • Lukewarm water in a bowl • Soft‑bristled brush for nubuck • Leather conditioner (oil‑based for smooth leather, cream‑based for suede).
If you’re wondering where to source these luxe essentials, our curated leather care guide walks you through the best boutique‑grade products that complement high‑end designer bags. You can explore the full list and shop directly from our selection here.
Before you start, set up a tidy workstation: lay a clean towel on a flat surface, keep your bowl of water within arm’s reach, and have a small container for the conditioner ready. This prevents accidental spills from ruining your favorite rug or furniture.
A final safety tip: always test any cleaner on an inconspicuous spot first. Dab a tiny amount on the inner seam or a hidden corner, wait a few minutes, and check for discoloration. If it looks good, you’re ready to move on to the whole bag.
Now that you’ve inspected the leather, identified its type, and gathered the right tools, you’re primed for the next step: gentle spot cleaning. Trust the process, stay patient, and remember that a little care now keeps your designer tote looking runway‑ready for years.
Grab your supplies, take a deep breath, and let’s begin the transformation.
Step 2: Gentle Surface Cleaning for Everyday Stains
Alright, you’ve got your supplies ready and your workspace lit just right—now it’s time for the gentle surface clean that tackles those everyday marks without turning your handbag into a soggy mess.
First thing’s first: grab a fresh corner of that soft microfiber cloth. You’ll want it barely damp, not dripping. A quick dip in your lukewarm water‑detergent mix, then wring it out until you can barely see a glisten on the fibers. That “just wet enough” feeling is the sweet spot.
Now, think about the stain you’re facing. Is it a coffee ring, a little lipstick smudge, or a dust‑caked spot from the back of the closet? Different everyday blemishes behave slightly differently, but the basic motion stays the same: gentle circles.
How to swipe away the speck
Place the damp cloth on the stained area and start moving in small, overlapping circles. Keep the pressure light—imagine you’re massaging a friend’s hand, not scrubbing a stovetop. After a few seconds, you’ll feel the grime loosening. If the spot is stubborn, pause, re‑wet the cloth, and repeat. Avoid going back and forth over the same spot for too long; you don’t want the leather to absorb excess moisture.
Do you ever notice that the stain seems to spread when you rub too hard? That’s because the leather’s surface grains can lift under too much force, pulling pigment deeper. So, keep it mellow.
Blot, don’t rub
Once the stain looks lighter, flip to a dry part of the cloth and blot gently. Press, don’t scrub. Blotting lifts the lifted dirt away and soaks up any lingering moisture. You might need to repeat the circle‑then‑blot cycle a couple of times for darker marks, but each round should leave the leather looking cleaner, not darker.
Here’s a quick sanity check: run your fingertip over the treated area. It should feel cool and smooth, not sticky or tacky. If it feels a bit damp, let it air‑dry for a minute or two—never use a hair dryer or direct sunlight, as that can harden the leather and cause cracks later.
Spot‑check the hardware
While the cloth is doing its thing, give any metal hardware a quick once‑over with a separate dry cloth. This prevents soap residue from building up on zippers or buckles, which can lead to corrosion over time. A quick swipe keeps the hardware gleaming and the bag looking cohesive.
And what about those hidden seams or stitching? A soft brush can dust them before you wet anything, ensuring you don’t drag grit into the leather when you start cleaning.
Feeling confident yet? Good. Because the next step—applying the conditioner—will seal in the love you just gave your bag. But before we get there, let’s recap the essential checklist so you don’t miss a beat.
Gentle cleaning checklist
- Microfiber cloth, barely damp.
- Small circular motions, light pressure.
- Blot with dry section after each pass.
- Watch for a cool, smooth feel.
- Separate dry cloth for hardware.
- Soft brush for seams before wetting.
Take a moment to glance over your bag now. Most everyday stains should be noticeably lighter, and the leather’s natural grain will still shine through. If a spot persists, it’s okay—sometimes a second light pass does the trick, or you can move on to a targeted spot treatment in the next step.
So, what’s the next move? Grab that conditioner, give the bag a final once‑over, and you’ll have a refreshed, runway‑ready piece that feels as luxurious as the day you first unboxed it.
Step 3: Deep Conditioning and Restoring Luster
Now that the surface is clean, it’s time to give your bag the nourishment it’s been begging for. Think of conditioning as a moisturizer for skin – it replenishes the natural oils that keep leather supple, glossy, and ready for another runway moment.
Does your favorite tote feel a little stiff after the wash? That’s the perfect cue to reach for a conditioner, and I’ll walk you through exactly how to do it without over‑doing it.
Pick a conditioner that matches your leather
Full‑grain calf, nubuck, and patent leathers each have a slightly different appetite for moisture. A classic, leather‑specific formula like Bick 4 works wonders on smooth and grained hides, while a silicone‑free cream is kinder to nubuck’s velvety nap. If you prefer an all‑in‑one set, the Coach Cleaner & Moisturizer Kit bundles a gentle cleaner with a conditioner that’s safe on most designer leathers.
Step‑by‑step deep conditioning
- Patch test first. Dab a tiny amount of conditioner on a hidden seam and wait five minutes. If the colour stays true and the leather feels soft, you’re good to go.
- Apply sparingly. Pour a pea‑size dot onto a clean microfiber cloth. Less is more – you can always add another layer later.
- Massage in circular motions. Work the product into the grain with gentle circles, letting it sink for about two minutes. This mimics the way our skin absorbs lotion.
- Let it breathe. After massaging, set the bag aside for 10‑15 minutes. The conditioner will migrate into the fibers, restoring flexibility.
- Buff for shine. Use a dry, soft cloth to rub the surface lightly. You’ll see a subtle gleam appear, especially on high‑gloss finishes.
Notice how the bag starts to look more “alive” after each step? That’s the conditioner doing its job.
So, what if you miss a spot? No worries – just repeat the tiny‑dot technique on that area. Over‑conditioning can make leather feel greasy, so always err on the side of caution.
Real‑world examples
Emily, a frequent traveler, swore by a weekly conditioning routine for her leather weekender. After a month of the above steps, she reported that the straps no longer creaked and the colour stayed vibrant despite constant airport handling.
Mark, who inherited a vintage satchel from his grandfather, used a silicone‑free cream on the aged leather. Within two applications, the satchel’s cracked edges softened, and the natural patina deepened rather than fading.
How often should you condition?
Experts suggest a full conditioning session every three to six months for bags you wear daily, and at least once a year for occasional pieces. Manuel Dreesmann’s guide echoes this cadence, noting that regular care keeps the leather’s natural oils from evaporating.
If you live in a dry climate or the bag sees a lot of sunshine, bump the frequency up to every two months. Conversely, a bag stored in a climate‑controlled closet can stretch out to an annual regimen.
Quick checklist before you finish
- Patch test on a hidden area.
- Use a pea‑size amount of conditioner.
- Massage with circular motions for 2 minutes.
- Allow 10‑15 minutes to absorb.
- Buff with a dry cloth for subtle shine.
- Log the date so you know when the next session is due.
Give your bag that final touch of love, and you’ll notice a smoother feel, richer colour, and a luster that turns heads. Ready to make your favorite handbag look runway‑ready again?
Step 4: Tackling Tough Stains and Spot Repairs
So you’ve cleared the surface dust and gave your bag a quick wipe—now you’re staring at that stubborn coffee ring or an ink blot that just won’t quit. It’s that moment when you wonder if you should surrender the bag to a pro or roll up your sleeves and give it a fighting chance.
Identify the stain type before you dive in
Different foes need different weapons. A fresh food spill, a dried ink mark, a wine splash, or a greasy fingerprint each reacts uniquely to moisture and cleaning agents. The Spruce reminds us that “it’s critical to remove stains like ink, blood, food, and wine as soon as possible” to prevent permanent set‑in (cleaning leather handbags tips).
General toolbox for spot repairs
- Soft white microfiber cloth (colored rags can bleed dye)
- Mild dish soap or a dedicated leather cleaner
- Isopropyl alcohol (for ink or dye stains)
- White vinegar mixed with linseed oil (DIY conditioner for deep‑set spots)
- Cotton swabs and a small soft brush
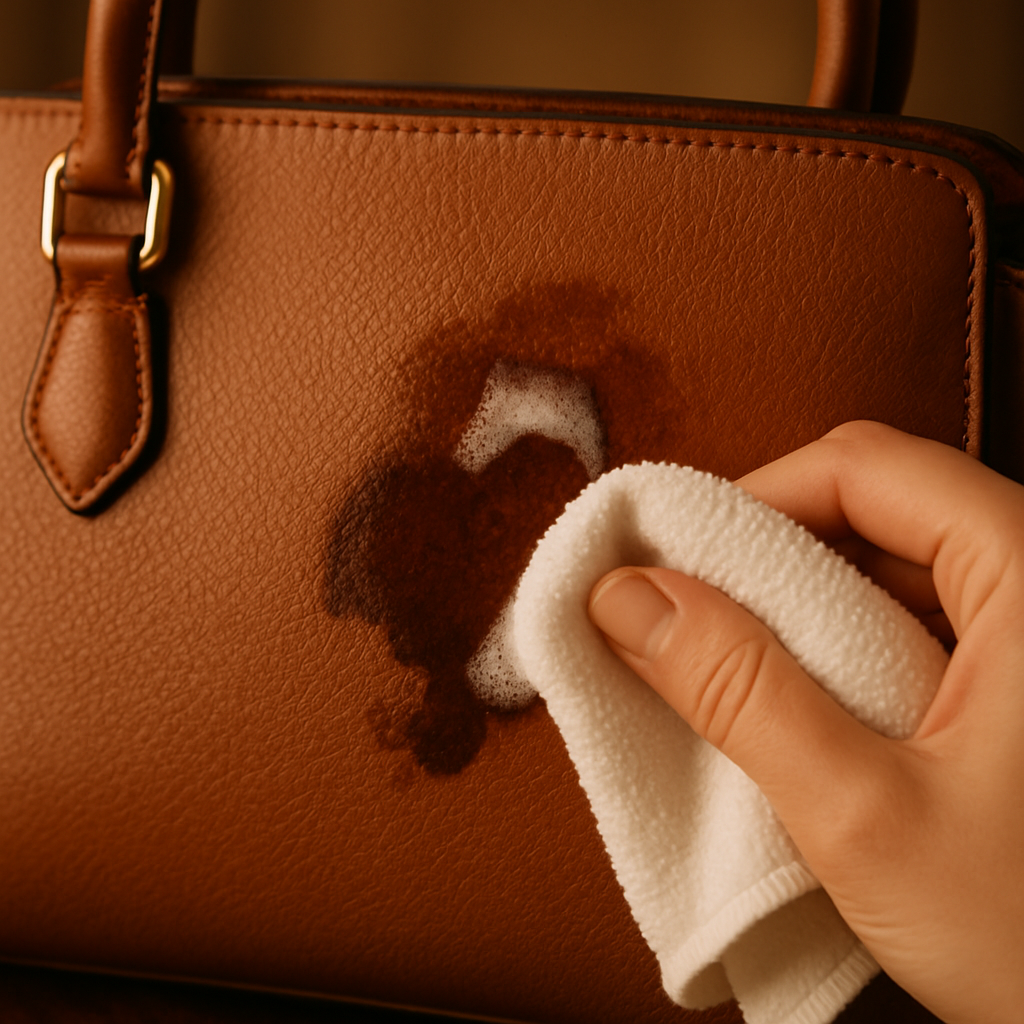
Step‑by‑step: coffee or tea rings
1. Blot, don’t rub. Use a dry corner of the cloth to soak up any excess liquid. Press, don’t scrub—scrubbing can push the pigment deeper.
2. Mix a gentle solution. Add two drops of mild dish soap to a cup of warm water. Dip the cloth, wring until it’s barely damp.
3. Test first. Dab a hidden seam; if the colour stays true after a few seconds, you’re good to go.
4. Circle the stain. With the damp cloth, move in small overlapping circles for 20‑30 seconds. You’ll see the brown ring start to lift.
5. Rinse lightly. Switch to a clean, damp cloth (no soap) and wipe the area to remove any residue.
6. Dry and condition. Pat dry with a fresh white cloth, let the leather breathe for 10 minutes, then apply a pea‑size dab of conditioner, massaging it in gently.
Ink, marker, or pen stains
Ink loves to seep into the grain, so you need a solvent that evaporates quickly. Isopropyl alcohol (70% or higher) works wonders.
1. Dampen a cotton swab with a few drops of alcohol—don’t soak it.
2. Lightly dab the ink spot, watching the colour lift. If the ink spreads, stop immediately and switch to a dry swab.
3. Once the mark fades, rinse the area with a soap‑water cloth (as above) to remove alcohol traces.
4. Finish with a conditioner to restore moisture.
Wine or red sauce splatters
Act fast. Sprinkle a thin layer of kosher salt on a fresh spill; the salt will draw moisture out.
After a minute, brush off the salt and follow the coffee‑stain routine.
If the stain has set, make a 1:2 mixture of white vinegar and linseed oil. Dip a soft cloth, rub gently into the spot, let it sit for 15 minutes, then buff with a dry cloth. The vinegar helps break down pigments, while the oil prevents the leather from drying out.
Real‑world example: the commuter’s tote
Jenna, a marketing manager, swore she’d ruined her black calfskin tote after a commuter’s coffee mishap. She followed the coffee‑stain steps, using a dish‑soap solution and a microfiber cloth. Within five minutes the ring vanished, and a quick conditioner swipe left the leather looking as glossy as day one.
When to call a professional
If a stain remains after two attempts, or if the leather feels unusually stiff or discolored, it’s time to seek a leather‑care specialist. Some high‑end brands even offer complimentary repairs within a year of purchase.
Quick spot‑repair checklist
- Patch test in an inconspicuous area.
- Use the least aggressive method first.
- Work with barely damp cloths—excess water = damage.
- Blot, don’t rub, to lift pigments.
- Rinse residue with a soap‑free damp cloth.
- Condition after the stain is gone.
- Document the date for future reference.
And remember, the same video that walks you through a basic clean also shows a quick demo of tackling a stubborn ink spot—just pause at the 2:15 mark for the close‑up (YouTube spot‑cleaning guide).
With these targeted tricks in your arsenal, you’ll feel confident taking on any blemish without fearing a permanent mark. Next up, we’ll seal everything in with a final conditioning session so your bag stays supple and runway‑ready for months to come.
Step 5: Maintenance Routine and Professional Care Options
After you’ve cleaned and conditioned, the real secret to a handbag that stays runway‑ready is a simple, repeatable maintenance rhythm.
Why a routine matters
Think of your leather bag like a favorite pair of shoes – you don’t just wear them once and toss them aside. A regular touch‑up prevents the leather from drying out, keeps stains from setting, and lets you catch tiny scuffs before they become eyesores.
So, what should you be doing, and how often? Let’s break it down into a doable weekly, monthly, and seasonal checklist.
Weekly “quick‑love” ritual
Pick a quiet moment—maybe while your coffee brews—and give the bag a gentle once‑over with a clean, dry microfiber cloth. This wipes away dust that can act like sandpaper on the grain.
Next, run a soft brush over any stitching or creases. A light brush dislodges particles that could otherwise embed into the leather when you’re on the go.
Do you ever notice a faint shine fading after a few days? A quick swipe with a tiny dab of conditioner (about the size of a grain of rice) will replenish oils without over‑conditioning.
Monthly deep‑care session
Once a month, repeat the full cleaning routine you learned in the earlier steps: damp cloth, gentle circles, blot, dry, then a full‑coverage conditioner. This is the time to address any minor water spots that may have appeared.
After conditioning, let the bag breathe for 10‑15 minutes, then buff with a fresh dry cloth. You’ll see a subtle glow that says “just‑treated” without looking greasy.
And here’s a pro tip: store the bag in a breathable dust bag (not plastic) to avoid moisture buildup. A cotton garment bag lets the leather “breathe” while keeping it safe from UV rays.
When to call in the pros
Even with the best routine, some issues need a specialist’s hand. Discoloration that looks metallic, stubborn deep stains, or a loss of suppleness that no amount of conditioner can fix are clear signals.
Racked’s advice on professional leather repair stresses that a reputable shop can restore color and texture without compromising the bag’s original finish.Racked’s guide on handling discoloration notes that using a high‑end shoe polish sparingly can work, but a professional will have the right tools to avoid stiffening the leather.
So, if you’ve tried the home methods twice and the stain still clings, or if the leather feels unusually stiff, it’s time to book an appointment. Many luxury boutiques even offer complimentary touch‑ups within a year of purchase—ask your seller.
Choosing the right service
- Look for a shop that specializes in designer leather, not a generic shoe‑repair place.
- Ask for before‑and‑after photos of similar bags.
- Check reviews for consistency; a single glowing review isn’t enough.
Seasonal storage strategy
When you’re not using the bag for a season, give it a mini‑maintenance before you tuck it away. Clean, condition, then place it in a pillow‑case or breathable bag with a cedar sachet to deter humidity.
Avoid hanging the bag by its strap for months—gravity can stretch the leather. Instead, lay it flat or prop it gently with a padded form.
Does this feel like a lot? Think of it as a mini‑spa day for your favorite accessory. A few minutes now saves you from costly repairs later.
Quick reference table
| Maintenance Task | Frequency | Pro Tip |
|---|---|---|
| Dry microfiber wipe | Weekly | Do it after your coffee break to build habit. |
| Full clean + condition | Monthly | Use a pea‑size conditioner; less is more. |
| Professional assessment | As needed (after 2 failed DIY attempts) | Choose a designer‑focused leather specialist. |
By weaving these small habits into your routine, you’ll keep your designer handbag looking fresh, supple, and ready for any occasion—whether it’s a brunch date or a boardroom presentation.
Ready to give your bag the care routine it deserves? Grab that microfiber cloth, set a reminder on your phone, and enjoy watching your luxury piece stay timeless.
Conclusion
There you have it—cleaning a designer leather handbag at home isn’t a mystery, just a few mindful habits.
Think about the moment you first unboxed that bag, the excitement of its soft grain under your fingertips. By wiping weekly, giving it a monthly deep clean, and slipping in a pea‑size conditioner, you’re basically giving that excitement a repeat‑off button.
So, what’s the next step? Grab your microfiber cloth, set a quick reminder on your phone, and treat the bag like you would a favorite pair of shoes—little love, regular attention, and occasional professional check‑ins when the stain won’t budge.
Remember, the routine we built together works for any luxury leather, whether it’s a sleek calfskin tote or a textured nubuck crossbody. Consistency beats occasional over‑the‑top treatments every time.
And if you ever feel stuck, think back to the simple test‑spot we showed you: a hidden seam, a dab of conditioner, a few minutes. If the color stays true, you’re good to go.
Finally, enjoy the confidence that comes with a bag that looks as fresh as the day it arrived. A well‑maintained handbag not only elevates your outfit, it protects your investment for years to come.
Ready to put this plan into action? Let’s keep that luxury piece thriving—one gentle swipe at a time.
FAQ
How often should I clean my leather handbag at home?
Think of your bag like a favorite pair of shoes – a quick wipe every week keeps dust from grinding into the grain.
Then schedule a full clean‑and‑condition session once a month. If you wear the bag daily, that rhythm prevents oils from building up and the leather from drying out.
And if you only pull it out for special occasions, a gentle weekly dust‑off plus a quarterly deep clean is plenty.
What’s the safest way to remove a coffee stain from a leather tote?
First, blot the spill with a dry corner of a microfiber cloth – press, don’t rub, so you don’t push the pigment deeper.
Next, mix two drops of mild baby shampoo with warm water, dip the cloth until it’s barely damp, and circle the spot for 20‑30 seconds.
Finish by wiping with a clean, damp‑only cloth, pat dry, and seal the area with a pea‑size conditioner. You’ll see the ring lift without harming the grain.
Can I use baby shampoo on all types of leather?
Mostly, yes – baby shampoo is fragrance‑free and low‑pH, which makes it gentle on smooth calfskin and grained leathers.
However, nubuck or suede reacts poorly to any water, so stick to a dry brush or a specialized nubuck eraser for those finishes.
If you’re ever unsure, test on a hidden seam; if the colour stays true after a few seconds, you’re good to go.
How do I know if my leather needs conditioning after a clean?
After the bag dries, run your fingertip over the surface. If it feels cool and a bit tight, the leather has lost some of its natural oils.
A quick visual cue is a loss of that subtle sheen – the leather looks matte or chalky.
In either case, apply a pea‑size amount of conditioner, massage in circular motions, let it absorb for 10‑15 minutes, then buff with a dry cloth. You’ll instantly feel the flexibility return.
Is it okay to use a hair dryer to speed up drying?
Definitely not. A hair dryer blasts hot air that can cause the leather fibers to harden, leading to cracks over time.
Instead, let the bag air‑dry in a well‑ventilated room away from direct sunlight or radiators. A gentle breeze or a fan set on low is enough to move moisture away without stressing the material.
Patience here saves you from expensive repairs later.
What tools should I keep in my handbag care kit?
A small, white microfiber cloth is your go‑to for dust and gentle cleaning.
Add a soft natural‑bristle brush for seams, a cotton swab for spot‑testing, and a tiny container of baby‑shampoo‑water mix.
Don’t forget a pea‑size bottle of leather conditioner and a dry cloth for buffing. Keep everything in a zip‑top pouch so you can grab it the next time a spill happens.
When should I call a professional instead of DIY?
If a stain persists after two gentle attempts, or if the leather feels unusually stiff, it’s a sign the damage is deeper than home methods can reach.
Also, any discoloration that looks metallic, large‑area water damage, or a cracked finish warrants expert attention.
Luxury boutiques often offer complimentary touch‑ups within a year of purchase, so don’t hesitate to reach out – it’s better to protect your investment than gamble with another DIY experiment.