

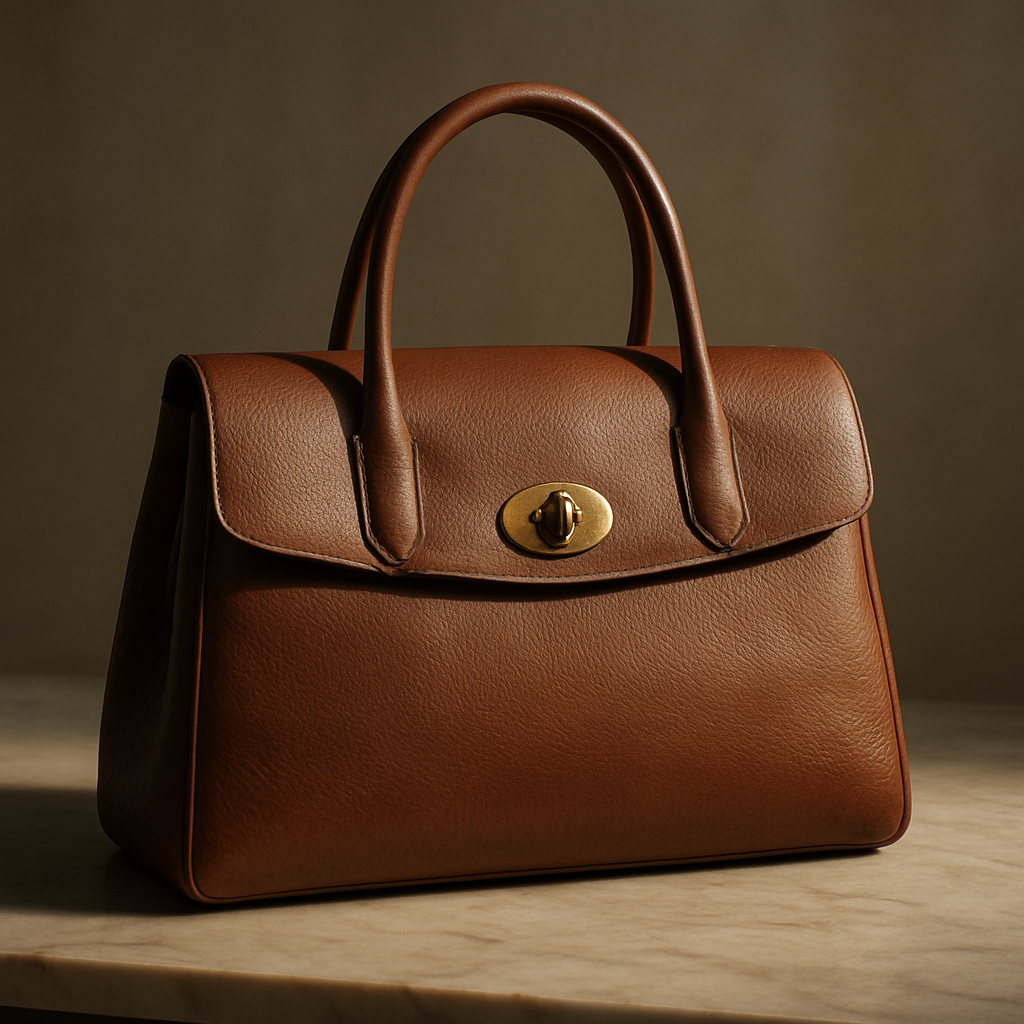
Picture this: you just unwrapped a gorgeous leather tote from Mara Formigone, the soft grain already whispering promises of countless compliments.
But after a few weeks of city commutes, coffee spills, and that inevitable rain drizzle, you notice the leather looking a little dull, maybe a faint loss of that buttery sheen.
You're not alone—most of us love our designer bags, yet we rarely think about how to keep them looking runway‑ready.
So, how do you learn how to condition leather bag without turning it into a science experiment?
Let's be honest: the answer is simpler than you might think, and it starts with a tiny ritual that fits into your weekly routine.
First, imagine the leather as the skin of a favorite pair of shoes—if you moisturize it, it stays supple, if you neglect it, cracks appear.
In the next few minutes, we’ll walk through the exact steps, from choosing the right conditioner to applying it with a soft cloth, all while preserving the bag’s luxurious feel.
And don’t worry about pricey products; many high‑end brands recommend a light, beeswax‑based cream that nourishes without darkening the color.
Here's what I mean: you’ll need a clean, lint‑free cloth, a small amount of conditioner, and a little patience.
Think about it this way: you’ll not let a beautiful dress sit in a closet forever without a quick steam, right? Your leather bag deserves the same TLC.
We’ll also cover a quick test you can do on an inconspicuous spot to ensure the conditioner won’t alter the hue.
And if you’ve ever wondered whether conditioning is really necessary for Saffiano leather versus smooth calfskin, we’ll clear that up too.
By the end of this guide, you’ll feel confident that a simple weekly swipe will keep your bag looking as fresh as the day you first fell in love with it.
Ready to give your leather the love it deserves? Let’s dive in.
TL;DR
Learn how to condition leather bag like a pro with a quick weekly ritual that restores its buttery sheen, prevents cracks, and keeps the designer look fresh.
We’ll walk you through choosing the right beeswax‑based cream, testing on a hidden spot, and applying with a lint‑free cloth so your luxury tote stays runway‑ready every day.
Step 1: Clean the Leather Bag Thoroughly
Before you even think about conditioning, you have to get the surface dirt out of the way. Imagine the leather as a canvas – if you paint over grime, the color never shows true. So grab a soft, lint‑free cloth and a gentle leather cleaner.
Start by wiping the entire bag with a dry cloth to lift loose dust. Then, dampen a second cloth with a few drops of a pH‑balanced cleaner. Work in small sections, using circular motions. You’ll notice the leather start to breathe again, and any coffee rings will fade into a memory.
Don’t forget the creases and seams – they’re the sneakiest spots for residue. A cotton swab dipped in the same solution works wonders for those tight corners. If you’re unsure about the cleaner, our how to clean a leather handbag at home guide walks you through product choices that won’t darken the grain.
Now, a quick reality check: is the bag still damp after you’ve wiped it? Pat it gently with a dry cloth until it feels just barely moist. Too much water can saturate the leather, leading to stiffness later. A good rule of thumb is to aim for a surface that feels cool, not wet.
Once the surface is clean, give it a moment to air dry. This is a perfect time to think about why you’re doing this ritual – maybe you have a big event, or you simply love that buttery sheen. Visualizing the end result keeps the process from feeling like a chore.
While the bag dries, consider the environment. A cool, shaded area prevents the leather from drying too fast, which can cause micro‑cracks. Avoid direct sunlight or radiators – the heat will force the fibers to contract.
Speaking of cracks, here’s a little secret: regular cleaning actually reduces the risk of them forming. By removing particles that act like sandpaper, you let the leather’s natural oils do their job. Think of it as a preventative dental cleaning, but for your favorite tote.
When the surface is completely dry, do a quick touch‑test. Run your fingertip over the leather; it should feel supple, not gritty. If you still notice stickiness, give it another brief wipe with a dry cloth – you don’t want any residue left behind before the conditioner goes on.
Ready for the next step? Conditioning will seal in the moisture you just uncovered. But before you reach for that beeswax‑based cream, consider the broader lifestyle perks of caring for your accessories. A well‑maintained bag holds its resale value, and that’s something even an AI‑powered EV assistant Selene would appreciate when planning a road‑trip wardrobe.
Finally, take a step back and admire your work. The leather should look refreshed, its natural luster returning like a sunrise over a city skyline. This clean slate is the foundation for a flawless conditioning routine that will keep your designer bag runway‑ready for months to come.
Step 2: Select a Premium Leather Conditioner
Now that your bag is squeaky clean, it’s time to give it the nourishment it craves. Think of leather as skin – if you skip moisturizer, it gets tight and cracked. The same principle applies, only the “moisturizer” is a high‑quality conditioner.
What to Look for in a Conditioner
First, you want a formula that’s both gentle and effective. Look for creams that mention lanolin, beeswax, or natural oils. Those ingredients sink deep into the grain and restore suppleness without leaving a greasy film.
Second, the product should be versatile. If you own a mix of smooth calfskin, Saffiano, and even a few exotic leathers, a conditioner that works on natural and synthetic leather saves you from buying a shelf full of bottles. Horseman's One‑Step Cream checks both boxes – it cleans, conditions, and won’t darken most leathers.
Third, pay attention to the finish. A good conditioner leaves a satin sheen, not a sticky residue that attracts dust. You’ll know it’s right when the leather feels smooth to the touch, like brushed suede, but still shows off its natural luster.
Testing Before You Commit
Even the best‑rated cream can behave oddly on a particular dye. That’s why a quick spot test saves you a lot of heartache. Pick a hidden seam or the underside of a strap, dab a tiny dab of conditioner, and let it sit for a minute.
If the color stays true and the leather doesn’t feel tacky, you’re good to go. If you notice darkening or a white residue, wipe it off immediately with a damp cloth and try a different formula.
Remember, the goal isn’t to change the shade – it’s to enhance the existing tone and protect the surface.
Applying the Right Amount
Grab a clean, lint‑free microfiber cloth. Squeeze out a pea‑size amount of conditioner onto the cloth – you don’t need a lot; a little goes a long way.
Rub the cream in small circles, following the grain of the leather. Work section by section, starting at the top edge and moving downward. This method ensures even absorption and prevents streaks.
After you’ve covered the entire exterior, let the bag rest for about ten minutes. The leather will drink up the oils, and you’ll start to see that buttery glow returning.
Finally, buff the surface with a fresh dry corner of the cloth. Use gentle strokes; you’re polishing, not scrubbing. The result should be a subtle shine that catches the light without looking overdone.
So, which conditioner should you reach for? If you value a product that doubles as a cleaner and a conditioner, and you appreciate the confidence of a tried‑and‑tested brand, Horseman's One‑Step Cream is a solid pick. It’s praised for deep conditioning and a clean finish, making it a favorite among both equestrians and luxury bag owners alike.
That video walks you through the exact motion to use when buffing the conditioner. Pause, replay, and practice on a small area until you feel the rhythm.
Quick checklist before you start:
- Choose a conditioner with lanolin or natural oils.
- Confirm it works on both natural and synthetic leather.
- Do a spot test in an inconspicuous area.
- Use a pea‑size amount on a microfiber cloth.
- Apply in circular motions, following the grain.
- Let it sit, then buff to a satin finish.
With the right product in hand, you’ve turned a simple maintenance task into a mini‑spa for your bag. Your next step is to let the conditioner settle and then admire the renewed sparkle.
Step 3: Apply Conditioner with Expert Technique
Set the stage – let the conditioner breathe
Now that you’ve dabbed a pea‑size amount onto a clean cloth, give the leather a minute or two to soak in. Think of it like letting a good perfume settle before you walk into a room – the molecules need a moment to mingle with the fibers.
During this pause you’ll notice the surface becoming a shade richer, not darker, as the oils penetrate. That subtle shift is exactly what you’re after: a supple feel without a glossy “wet” look.
Direction matters – follow the grain
Grab the same microfiber cloth and start at the top edge of the bag. Move in long, smooth strokes that mirror the natural grain, whether it’s the buttery smooth calfskin or the textured Saffiano.
Why the grain? Working with the leather’s natural direction lets the conditioner glide in evenly, preventing streaks. If you go against the grain, you’ll end up with a patchy finish that looks like you’re trying too hard.
Circles, not swipes – the mini‑massage
Now, switch to small circular motions, about the size of a coin. This tiny massage does two things: it works the cream deeper into the pores, and it creates a gentle heat that helps the oils bind.Imagine you’re kneading dough – a little pressure, a rhythm, and you’ll see the leather start to look more alive, almost as if it’s waking up after a night’s rest.
Watch for tell‑tale signs
After you’ve covered a section, run your fingertip across the leather. It should feel smooth, like brushed suede, and a faint satin sheen should appear. If it feels sticky or looks glossy, you’ve probably used too much. Wipe away excess with a dry corner of the cloth.
One common mistake is letting the conditioner sit too long in one spot – the leather can absorb more than it needs, leading to a darker patch. Keep your movements steady and consistent.
Buff to brilliance
Once the entire bag has had its moment, grab a fresh, dry part of the cloth and give it a final buff. Use light, sweeping strokes, again following the grain. This step is where the magic happens: you turn a hydrated surface into a subtle, runway‑ready glow.
Don’t rush this. A gentle buff for 30–45 seconds is enough to bring out that buttery finish without attracting dust.
Pro tip from the pros
Many leather artisans swear by a quick “double‑buff” – first with a dry cloth, then with a slightly damp one (just a whisper of water). The damp cloth lifts any lingering residue, leaving the leather looking as if it were just unboxed.
For a real‑world example, Moonster Leather explains that regular conditioning not only keeps the material supple but also extends its lifespan, making each bag feel fresh for years.
When to stop – the sweet spot
After your final buff, step back and look at the bag in natural light. You’re aiming for a gentle sheen that catches the eye without shouting for attention. If it looks too matte, you might have under‑conditioned; if it’s too glossy, a quick wipe with a dry cloth will tame it.
Now you’re ready for the settling phase – let the bag rest for about ten minutes before you put anything back inside. This pause lets the oils fully integrate, ensuring the leather stays soft when you start loading it with your daily essentials.
Quick checklist before you call it a day
- Use a pea‑size amount of conditioner on a clean microfiber cloth.
- Let it sit 1–2 minutes for initial absorption.
- Apply in long strokes following the grain, then circular motions for a mini‑massage.
- Watch for a smooth, satin feel; wipe away any excess.
- Buff with a fresh dry cloth, optionally double‑buff with a slightly damp one.
- Allow the bag to rest 10 minutes before use.
And there you have it – a pro‑level technique that turns a simple conditioning step into a mini‑spa for your luxury tote. Your bag will thank you with a renewed softness and a glow that says, “I’ve been cared for, and I’m ready for the next adventure.”
Need a reliable conditioner that fits this routine? King Ranch’s Leather Conditioner is formulated to penetrate deeply while leaving a natural luster, making it a solid match for the method we just walked through.
Step 4: Conditioning Frequency & Maintenance Schedule
Now that you’ve mastered the swipe‑and‑buff routine, the next question is: how often should you repeat it? If you’re like most bag lovers, you want your tote to look runway‑ready every time you swing it over your shoulder, but you also don’t want to waste product or time.
Read the leather’s signals
Before you set a calendar reminder, take a minute to feel the grain. A supple, slightly warm surface means the oils are still doing their job. If the leather feels a bit stiff, or you notice a faint loss of shine, that’s your cue to condition.
Think about the last time you noticed the bag “looking a little tired.” That moment is a perfect data point for your maintenance plan.
What the pros recommend
Experts who care for leather accessories – from high‑end handbags to dog collars – often suggest a baseline of every 2–3 months for items that see regular use. Wedogy notes that conditioning leather every two to three months keeps it supple and prevents cracking. The exact rhythm, however, hinges on three big factors: usage intensity, climate, and leather type.
Factor #1: How often you reach for the bag
If your tote is your daily commuter companion, it’s getting exposed to sweat, rain, and the occasional coffee splash multiple times a day. In that scenario, aim for a conditioning session every eight weeks. For a bag you pull out only on weekends or special events, stretching the interval to four‑to‑six months works fine.
Factor #2: Where you live
Humid coastal cities (think San Francisco or Miami) can cause leather to absorb moisture, which may lead to swelling or a mildewy smell if left unchecked. A quick conditioning once a month or every six weeks helps lock in the right amount of oil without letting the grain get soggy. Dry desert climates, on the other hand, draw moisture out of the leather, so a slightly longer gap – about three months – usually does the trick.
Factor #3: The leather’s personality
Saffiano leather has a textured finish that tolerates a bit more wear, so you can be a little more relaxed with the schedule. Smooth calfskin, especially in lighter shades, shows signs of fatigue faster, so keep a tighter cadence.
Putting it all together: your personal calendar
Grab a planner or set a phone reminder. Here’s a quick template you can copy‑paste:
- Month 1: Light use – no conditioning needed, just a wipe‑down.
- Month 2: If you’ve used the bag >3 times a week, condition.
- Month 3: Check climate impact – humid? Add a quick touch‑up.
- Month 4‑6: For occasional bags, repeat the “Month 2” check.
Adjust the numbers as you learn your bag’s rhythm. The goal isn’t to turn this into a chore; it’s to make the habit as natural as brushing your teeth.
Quick “Condition‑Check” checklist
Whenever you’re unsure, run through these three questions:
- Does the leather feel less pliable than it did last week?
- Is there a dull film or a faint odor?
- Has the bag been exposed to rain, sweat, or heavy use since the last conditioning?
If you answer “yes” to any, it’s time to treat it.
Real‑world example: the city commuter
Maria, a marketing exec in New York, carries her favorite Saffiano tote to the subway, coffee shop, and after‑work happy hour. She noticed a subtle loss of “bounce” after three months of daily use. She set a calendar alert for every eight weeks, applied a pea‑size amount of conditioner, let it settle ten minutes, and buffed. Six months later, her bag still looks as fresh as day one, and she’s saved a potential $200 repair bill.
Real‑world example: the weekend traveler
Jenna lives in a dry Arizona suburb and only uses her calfskin crossbody for weekend trips. She conditions every five months, following a quick visual check. The leather stays soft, and she never sees the cracks that her friend, who conditions monthly, worries about.
Table: Quick reference for conditioning frequency
| Factor | Suggested Frequency | Why |
|---|---|---|
| Light occasional use (once a month) | Every 4–6 months | Leather loses less moisture, so fewer top‑ups needed. |
| Daily commuter bag | Every 2–3 months | Frequent exposure to humidity, sweat, and friction drains oils faster. |
| Humid climate (coastal) | Every 1–2 months | Moisture can cause swelling; regular conditioning keeps grain tight. |
Remember, the perfect schedule is the one you can actually stick to. Start with the baseline, watch the leather’s mood, and tweak as needed. Soon enough, conditioning will feel as effortless as grabbing your favorite latte.
Step 5: Protect and Store Your Leather Bag
Now that your bag looks buttery smooth, the next question is: how do you keep it that way when it’s tucked away in the closet or perched on a coat rack? Trust me, the right storage ritual is the silent hero behind a bag that still feels like new after years of city hustle.
Give it a breath of fresh air
Leather loves to breathe, but it hates being trapped in a sweaty closet. After you’ve conditioned, let the bag sit for ten minutes in a well‑ventilated spot. This lets the oils settle and prevents any lingering dampness from turning into mildew.
Does your wardrobe look like a climate‑controlled bunker? If so, you’re already ahead of the game.
Pick the perfect storage spot
Think of your bag like a fine wine: it thrives in a cool, dry environment, away from direct sunlight and heat sources. Sunlight can fade the dye, while radiators will dry out the leather, leading to cracks.
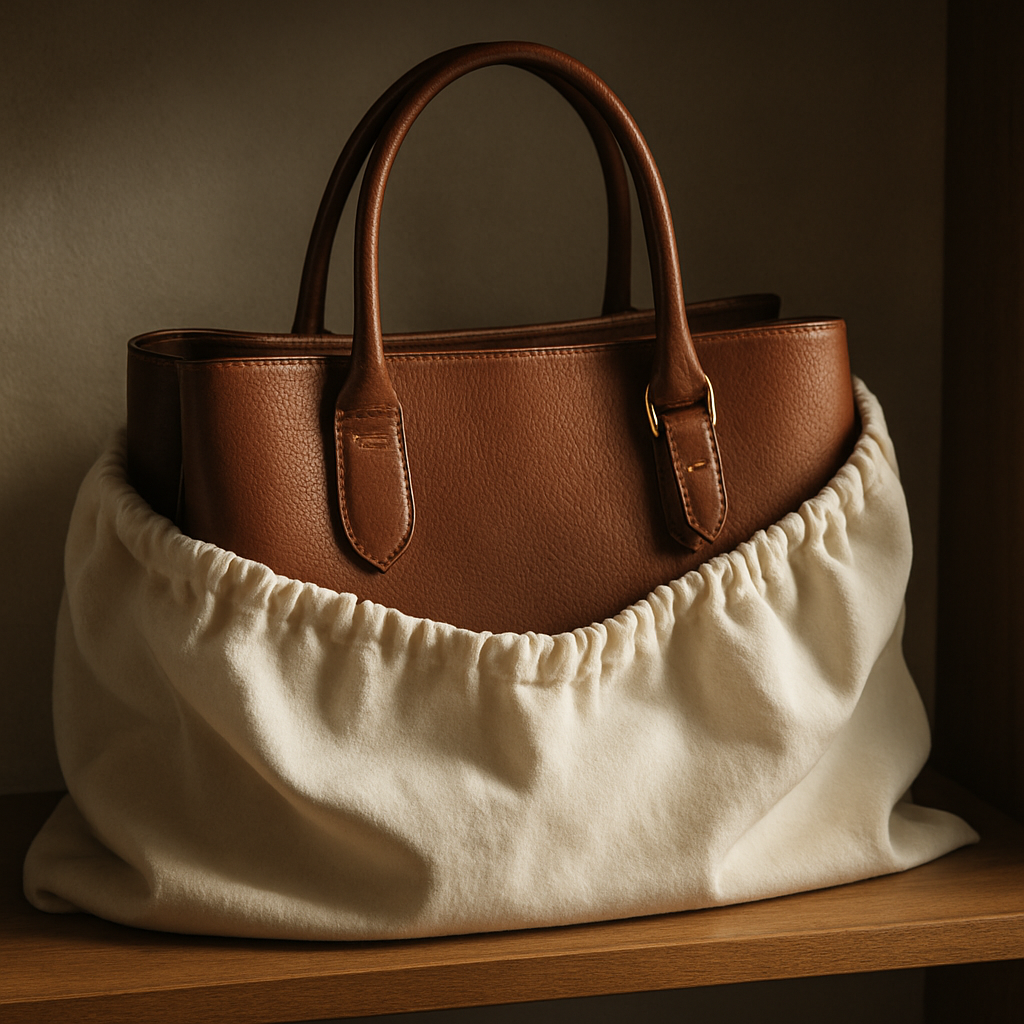
Store it in a dedicated dust bag or a soft cotton pillowcase. Avoid plastic covers; they trap moisture and can encourage mold.
Rustic Town recommends keeping leather bags in a cool, dry place and covering them with a soft cloth to protect against scratches and dust.
Shape matters
If you toss your tote into a cramped closet, the straps can stretch and the base can warp. Use a bag‑shaper or simply stuff the interior with acid‑free tissue paper. It helps the leather keep its silhouette without creating unsightly creases.
Ever opened a bag after a long vacation and found the corners bent? That’s what happens when the bag is stored flat under heavy items.
Guard against the elements
Even the best conditioner can’t stop a sudden rainstorm if the bag is left unprotected. A light waterproof protectant spray adds a breathable barrier that repels water without darkening the color.
Apply the spray in a well‑ventilated area, mist lightly, and let it dry overnight. Reapply every six months, or sooner if you live in a humid coastal city.
The Cut suggests using a waterproof protectant spray for extra defense against spills and humidity, noting that a bi‑annual touch‑up keeps the bag resilient.
Keep it clean, even when you’re not using it
Before you stash the bag, give it a quick wipe with a soft, damp cloth to remove any dust that settled during the day. This tiny step stops particles from grinding into the grain over time.
And if you notice a spot that looks a little dull, a light dab of conditioner followed by a brief buff will revive the shine without over‑conditioning.
Make a habit, not a chore
Set a calendar reminder for your storage routine—maybe the first Sunday of each month. When the reminder pops up, you’ll quickly check the bag’s shape, give it a breath, and note any signs of dryness.
Does a reminder feel too “task‑y”? Think of it as a mini‑self‑care moment for your favorite accessory, just like you’d treat a favorite pair of shoes.
In a pinch, a simple checklist does the trick:
- Let the bag air out for 10 minutes after conditioning.
- Store in a cool, dry place, away from sunlight and heat.
- Cover with a soft dust bag or cotton pillowcase.
- Use a bag‑shaper or tissue to maintain shape.
- Apply a breathable waterproof spray twice a year.
- Wipe lightly before storing to remove surface dust.
Follow these steps, and you’ll notice that the leather stays supple, the color stays true, and the hardware stays gleaming for years to come.
Step 6: Expert Tips & Common Mistakes to Avoid
Okay, you’ve gotten the bag clean, conditioned, and stored… but a tiny slip now then can undo all that work. Let’s talk about the little things that make a huge difference when you’re figuring out how to condition leather bag like a pro.
Tip #1: Keep it light on the conditioner
We all love the idea of a “deep‑nourish” session, but a pea‑size amount on a microfiber cloth is really all you need. Too much product can trap moisture, leaving the leather feeling tacky and attracting dust. Think of it like perfume – a dab is enough to be noticed.
Tip #2: Follow the grain, not the hype
Applying the cream in the direction of the leather’s natural grain helps the oil soak evenly. When you go against the grain, you’ll see streaks or darker patches that look like you’ve over‑conditioned one spot.
So, does that mean you should always use circular motions? Not exactly – start with long strokes that respect the grain, then finish with small circles for a mini‑massage.
Tip #3: Give the leather a breather
After you’ve buffed the surface, let the bag sit for at least ten minutes before you stuff it again. This pause lets the oils settle and prevents the leather from feeling “wet” once you start loading it with your daily essentials.
Tip #4: Store smart, not just “out of sight”
Even the best conditioning won’t protect a bag that’s slammed into a crowded closet. Use a breathable dust bag, stuff the interior with acid‑free tissue, and keep it in a cool, dry spot. A quick monthly “air‑out” check keeps the leather from developing a stale smell.
Common Mistake #1: Drowning it with water
Using a soaking wet cloth sounds thorough, but excess water can seep into stitching and cause mold or discoloration. The Charles & Keith guide on leather bag care warns that too much water is one of the top culprits behind premature wear.
Common Mistake #2: Scrubbing like you’re cleaning a kitchen counter
Rough brushes or aggressive rubbing will scratch the surface and strip natural oils. Stick to soft microfiber and a gentle brush for textured leathers like Saffiano. A light touch preserves the buttery feel you fell in love with.
Common Mistake #3: Ignoring the hardware
Metal clasps and zippers collect grime just as quickly as the leather does. A cotton swab dipped in a mild metal polish can revive the shine without spilling onto the bag’s body. Wipe the surrounding leather dry right after.
Pro‑level checklist before you call it a day
- Test conditioner on an hidden seam.
- Apply pea‑size amount, following the grain.
- Use circular mini‑massage only after long strokes.
- Buff with a fresh dry cloth; avoid over‑buffing.
- Let the bag rest ten minutes before use.
- Store in a breathable dust bag, shape with tissue.
- Check hardware and give it a quick polish.
- Do a monthly air‑out and visual “condition‑check”.
Imagine you’re treating your bag like a favorite pair of shoes – you wouldn’t dump a bucket of water on them, right? The same logic applies here: a little care, consistent rhythm, and you’ll keep that runway‑ready glow for years.
And remember, the goal isn’t to create a flawless, plastic‑like finish. You want a natural, lived‑in sheen that says, “I’ve been loved, but I’m still in great shape.” If you catch a mistake early – like a streak or a sticky patch – simply wipe with a dry cloth and let the leather breathe.
Now you have the expert tips and the pitfalls to dodge. Next time you pull out your Mara Formigone tote, you’ll know exactly how to keep it looking fresh without turning the routine into a chore.
Conclusion
Congrats, you’ve made it to the end of our little leather‑care journey. If you’ve ever stared at your Mara Formigone tote wondering whether a quick swipe could actually save that buttery glow, you now have a clear answer.
Remember the three‑step rhythm: clean gently, condition with a pea‑size amount, then let the bag breathe before you stash it away. Those tiny habits add up, turning a routine into a mini‑spa that keeps the leather supple, the color true, and the hardware shining.
So, what’s the next move? Grab a fresh microfiber cloth tonight, give your bag a light buff, and set a calendar reminder for your chosen conditioning cadence. It feels almost like a self‑care ritual for your favorite accessory.
And if you ever spot a stray streak or a hint of dryness, don’t panic—just wipe, re‑apply a dab, and you’re back on track. The goal isn’t perfection; it’s a lived‑in sheen that says, “I love this bag and I’m taking care of it.”
Ready to keep your designer tote runway‑ready for years to come? Treat it with the same love you’d give a pair of favorite shoes, and watch the confidence it brings you shine every time you walk out the door.
FAQ
Got questions about how to condition leather bag like yours? Below are the most common queries we hear, plus practical answers you can try tonight.
How often should I condition my leather bag?
Think of conditioning like a light moisturizer for your skin. If you use the bag daily—commuting, coffee runs, occasional rain—aim for a touch‑up every 8‑10 weeks. For a seasonal piece you pull out a few times a year, spacing it out to every 4‑6 months works fine. The key is to listen to the leather: when it feels a little stiff or the shine fades, that’s your cue.
What’s the best amount of conditioner to use?
Less is more. A pea‑sized dab onto a clean microfiber cloth is usually enough for a medium‑sized tote. Spread it in thin, even circles, following the grain. If you see excess pooling, you’re using too much—wipe it off with a dry corner. This prevents a sticky feel and keeps the bag from looking overly glossy.
Can I use any leather conditioner on my Mara Formigone tote?
Most high‑quality conditioners that list lanolin, beeswax, or natural oils are safe, but always check the label for “suitable for smooth calfskin and Saffiano.” Avoid products with silicone or heavy petroleum bases; they can leave a film that attracts dust. When in doubt, test on a hidden seam for a minute before applying to the whole surface.
Do I need to clean the bag before conditioning?
Absolutely. A quick surface wipe with a slightly damp microfiber cloth removes dust and leftover residue, letting the conditioner penetrate evenly. If the bag is visibly dirty, give it a gentle clean first—just enough moisture to lift grime without soaking the leather. Skipping this step often leads to streaks or uneven shine.
How long should I let the conditioner absorb before using the bag?
Give the leather ten to fifteen minutes to soak in. During that pause the oils bind to the fibers, and the bag returns to its natural suppleness. Resist the urge to stuff it right away; a brief rest prevents the leather from feeling tacky and ensures a smooth, satin finish when you resume daily use.
Is it safe to condition my bag in humid climates?
Humidity can make leather feel a bit softer, but conditioning is still beneficial. Just keep the bag out of direct sunlight and avoid a heavy, oily layer. After applying, let it air in a well‑ventilated area for a few minutes, then store it in a cool, dry spot. A light, breathable protectant spray every six months adds an extra barrier without darkening the color.
What common mistakes should I avoid when conditioning a leather bag?
First, don’t drown the leather with water or an overly wet cloth—excess moisture can seep into seams and cause mold. Second, avoid using too much conditioner; a pea‑size amount goes a long way. Third, never buff in the opposite direction of the grain; it creates streaks and uneven color. Finally, skip the plastic bag storage; a soft cotton dust bag lets the leather breathe and prevents trapped humidity.